Tiny Cabin In The Woods (Behind our Shed)

It took more than two days to build.

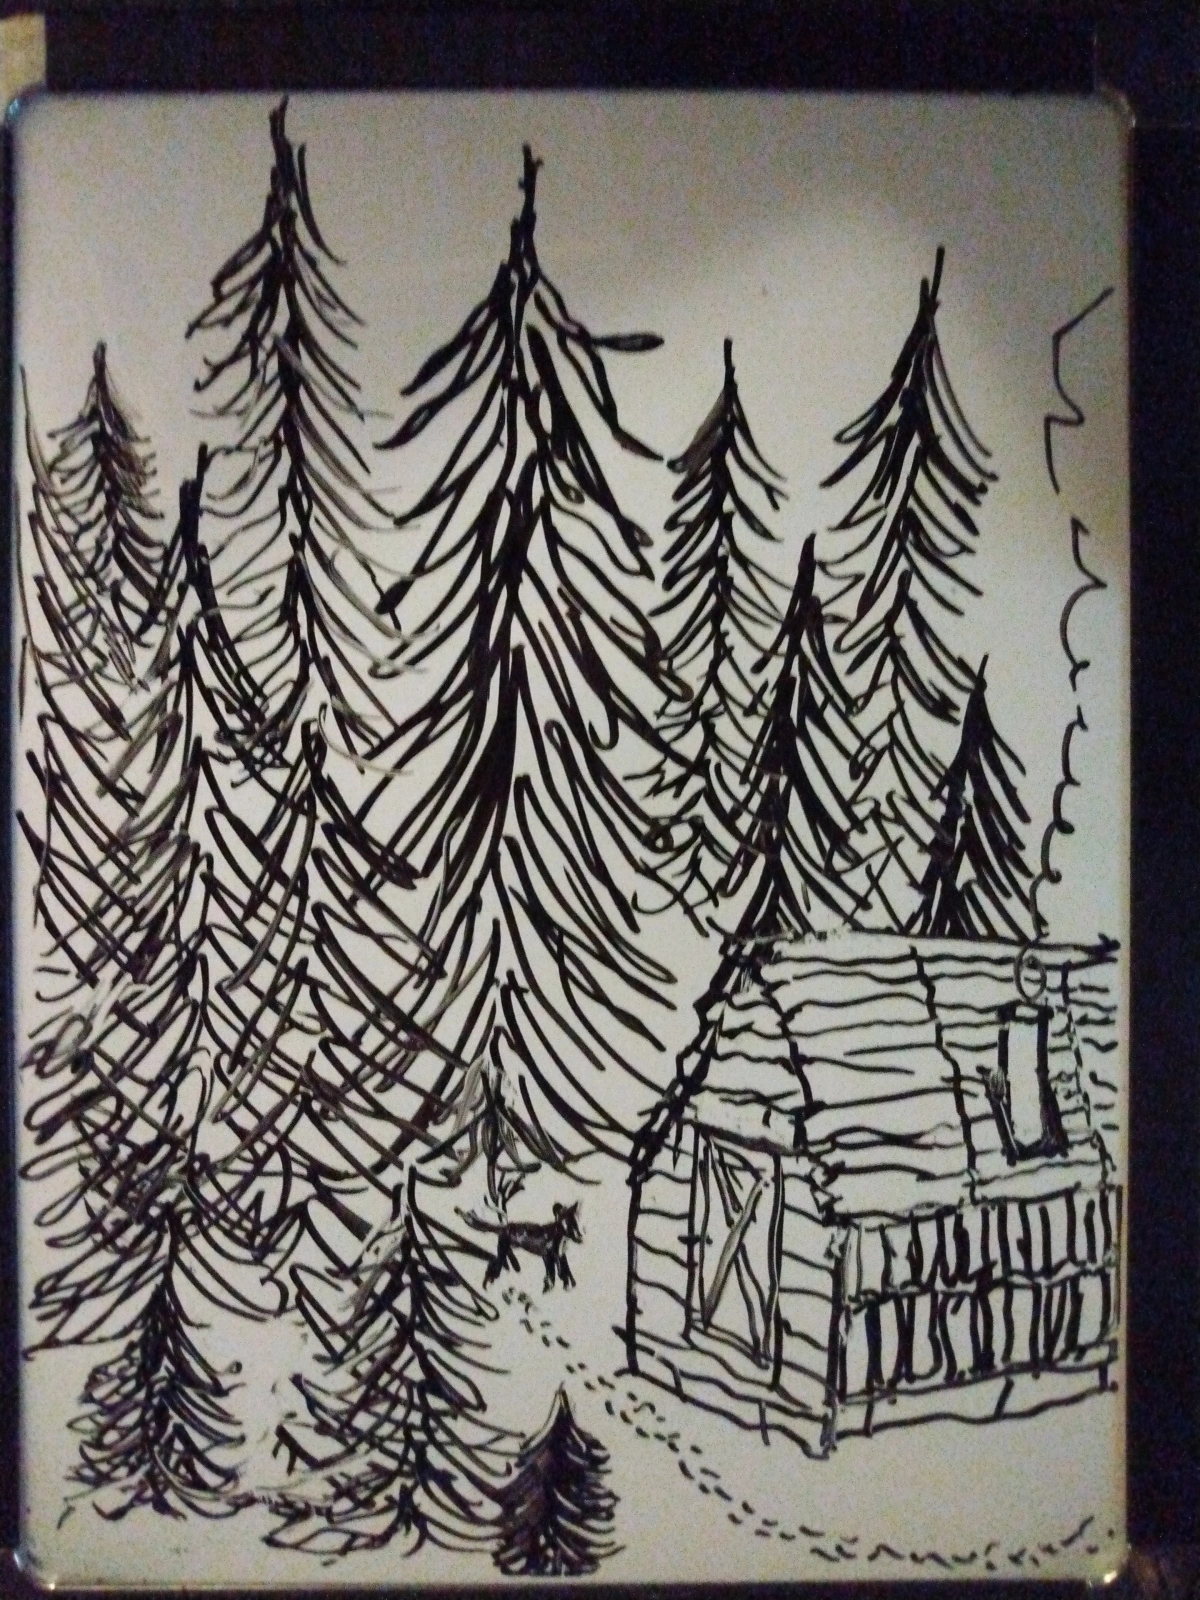
Do you like to fall asleep to the sound of rain or a blizzard raging outside – from just inside the windowpane of a tiny cabin tucked amongst some trees on a mountainside?

What makes us gravitate to those sorts of settings?

My husband and I pick a video off of Youtube every night at bedtime that features such a scene. Imagining yourself warm and safe, wrapped in blankets in bed next to a fire is an invitation to sleep. The worse the storm, the better.

One evening after discussing this fascination, I decided to make it for real and set out to build a tiny cabin to sleep in when it storms.

I found a suitable spot behind our shed in a small clearing to throw it together in a day or two. Like the Cabin For The Cats, it took a little longer but I really like how it turned out.

Made of pallets rather than logs as we get most of our wood from a business downtown in almost limitless quantities, it looks decently impressive, mostly on the inside.

My idea was first, to make a simple A-frame but I didn’t have the right pieces to do it so I redesigned with what I had. I used the thicker pieces for the frame, of course, and filled in the blank spots with the slats from the pallets.

I installed our homemade propane canister fireplace to finish it.

The porch came last.

Have a look, rather than me try to describe it. I’m actually proud of myself!

The Amazing Miracle Pallet

Never seen on TV

Free wood!

If you live off the grid or just have a lot of projects requiring wood, pallets are perfect.

They are a great choice for many reasons:

  • They’re free
  • They’re already nailed together
  • There are plenty of them
  • They have a billion possible uses
  • You can find them EVERYWHERE

Where can you find them?

  • Behind grocery stores
  • In the alleys behind hardware stores
  • In the garbage/recycling areas of businesses
  • On Craigslist

What can you do with them?

  • Make furniture for your house.
  • Craft projects: Signs, decorations, hangers for jewelry, etc.
  • Shop uses: shelves, tool holders, work tables.
  • Dismantle them and burn them
  • Build a shed or even a house out of them.

To cut them up or dismantle individual planks use:

  • a jig saw
  • a circular saw
  • a pry bar
  • a nifty tool we bought at an Ace Hardware called The Wrecker (a fancy pry bar with extra “bars” for whatever leverage you need
  • a hammer and a chisel for working the nails out
  • a hammer to just whack the slats free (might break it)
  • a couple of two by fours to remove individual planks without breaking them

For assembling various projects use:

  • A drill and drill bits for pilot holes through thick boards
  • A screw guide for the drill (a MUST)
  • Wood or deck screws of varying lengths
  • Nails
  • Brackets made by screwing two pieces of wood together or metal ones from the hardware store to add extra strength at attachment points
  • Circular saw for cutting leg lengths and larger straight surfaces
  • Hand saw
  • Hammer
  • C-clamp for holding pieces together tightly (the third arm) while installing screws
  • Jig saw
  • Tape measure
  • Wood router
  • Wood pencil for marking (works even on wet surfaces)
  • Other hardware such as hooks and hangers
  • Varnish

 General tips:

  • That screw guide for your drill makes sinking those long screws SO much easier
  • C-clamp for securing pieces – night and day
  • Pilot holes for those thick pieces. You’ll strip the screws otherwise
  • Pilot holes to prevent cracking. You don’t always have to but if the wood is prone to cracking or on the thin side, it’ll help
  • Look for the better specimens in pallets. There are some shitty torn up ones you just pass up
  • If you do end up with a shitty pallet, you can add slats from another shitty pallet to make one whole shitty pallet

Here are some photos of things we’ve done so far: